 QiMeal
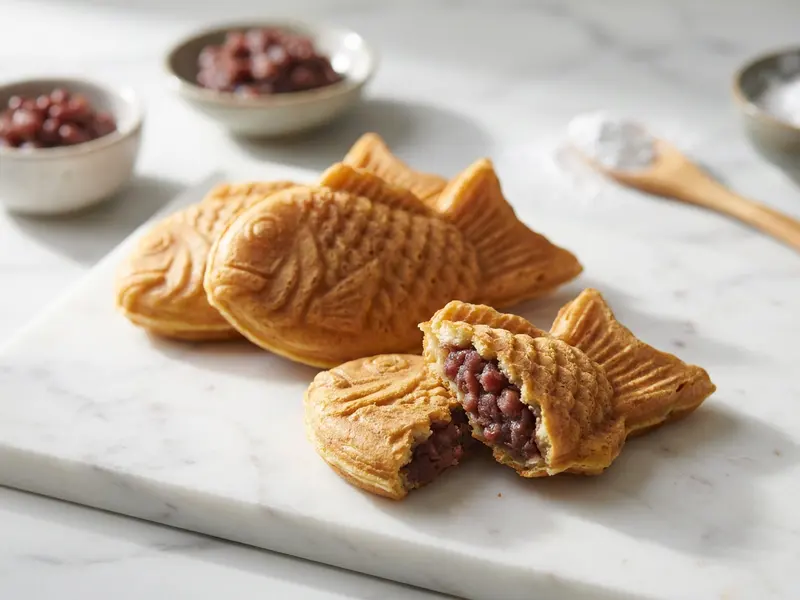
Taiyaki
Taiyaki · ready in 55 min · 8 servings · 221 kcal per serving · medium · 9 ingredients
Taiyaki is a beloved Japanese street sweet with a crisp fish shaped shell and a warm red bean center that feels nostalgic, simple, and comforting.
- Prep
- 30 min
- Cook
- 25 min
- Total
- 55 min
- Serves
- 8
- kcal
- 221
- Difficulty
- medium
Ingredients · 8 servings
- 180 gFlour, sifted
- 40 gSugar
- 8 gBaking powder
- 2 gSalt
- 2Egg, beaten
- 240 mlMilk
- 60 mlWater
- 10 gButter, melted
- 240 gRed bean paste
Equipment
stovetop, mixing bowl, whisk, sieve, ladle, spatula, pastry brush, cooling rack, taiyaki pan, measuring jug, spoon, serving plate
Instructions
- Gather ingredients
Gather and weigh all ingredients, then set out a bowl, whisk, sieve, ladle, spatula, brush, cooling rack, and taiyaki pan. · 8 min
What to look for: All ingredients are measured and tools are within reach.
- Mix dry ingredients
Sift flour and baking powder into the bowl, then whisk in sugar and salt until the dry mixture looks even. · 3 min
What to look for: The flour mixture is pale, fine, and evenly blended.
- Make smooth batter
Whisk egg with milk and water, pour into the dry mixture, and stir just until a smooth pourable batter forms. · 4 min
What to look for: The batter flows from the whisk in a steady ribbon with no dry pockets.
- Rest batter
Rest batter at room temperature for 15 minutes so the flour hydrates and small bubbles settle. · 15 min
What to look for: The batter looks slightly thicker and more uniform.
- Heat taiyaki pan
Heat the taiyaki pan on medium heat, brush lightly with melted butter, and check that the metal is evenly hot. · 4 min
What to look for: A thin coat of butter shines across the patterned molds.
- Fill the molds
Pour batter to half fill each mold, spoon red bean paste in the center, and cover with enough batter to close the fish shape. · 5 min
What to look for: The filling is covered and the batter reaches the edges of the molds.
- Cook until golden
Close the pan and cook, turning once, until both sides are golden and the edges release cleanly; repeat with remaining batter. · 16 min
What to look for: Each taiyaki is golden brown with defined scales and crisp edges.
- Serve warm
Serve taiyaki warm, letting them cool for 2 minutes on a rack so the filling is hot but safe to bite. · 2 min
What to look for: The cakes are warm, crisp outside, and tender around the filling.
Nutrition (per serving)
| kcal | 221 |
|---|---|
| Protein | 7 g |
| Carbohydrates | 41 g |
| of which sugars | 19 g |
| Fat | 4 g |
| of which saturated | 2 g |
| Fibre | 2 g |
| Sodium | 258 mg |
Nutri-ScoreC
Allergens
Contains: gluten, milk, eggs
Storage and reheating
- Fridge: up to 3 days
- Freezer: yes, up to 2 months
- Reheat in the oven until the shell feels crisp again and the filling is warmed through.
Ingredient substitutions
Flour
- Cake flour: Gives a slightly softer shell while keeping the taiyaki style.
Sugar
- Caster sugar: Dissolves quickly and keeps the same sweetness.
Baking powder
- Self rising flour: Use only if replacing the flour with self rising flour and omit the baking powder.
Salt
- Fine sea salt: Use the same weight for an even seasoning level.
Egg
- Whole egg: Use the same weight if your eggs differ in size.
Milk
- Water: Makes the shell lighter but less rich.