 QiMeal
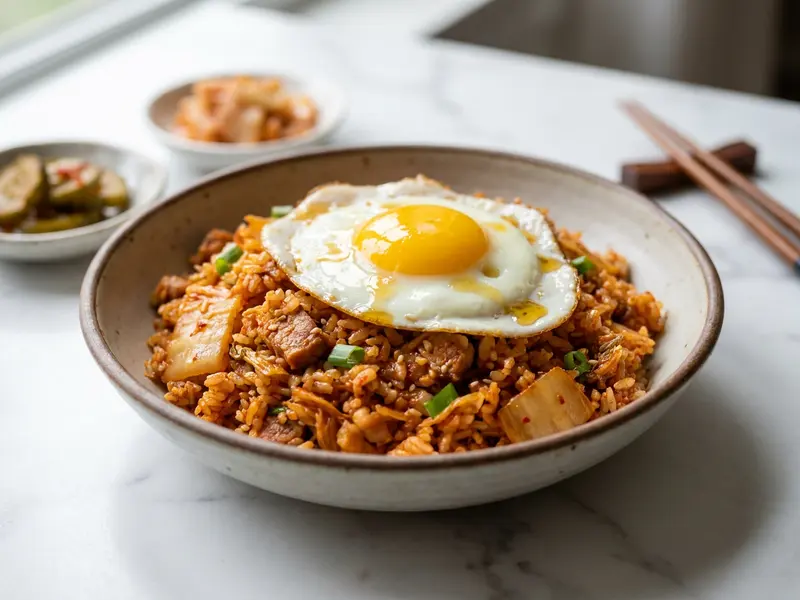
Kimchi bokkeumbap
Kimchi bokkeumbap · ready in 30 min · 4 servings · 627 kcal per serving · easy · 10 ingredients
Kimchi bokkeumbap turns sour aged kimchi and cold cooked rice into a smoky, tangy comfort bowl crowned with a runny fried egg.
- Prep
- 9 min
- Cook
- 21 min
- Total
- 30 min
- Serves
- 4
- kcal
- 627
- Difficulty
- easy
Ingredients · 4 servings
- 450 gAged kimchi, chopped with juice reserved
- 800 gRice, cooked and cooled
- 200 gPork, diced
- 50 gGochujang
- 4Egg, for frying (to serve)
- 24 gSesame oil
- 28 gVegetable oil
- 30 gSoy sauce
- 8 gSugar
- 12 gGarlic, minced
Equipment
stovetop, wok, large skillet, skillet, spatula, mixing bowl, knife, cutting board, measuring spoon, spoon, serving spoon, serving bowl
Instructions
- Gather Ingredients
Gather measured ingredients, a wok or large skillet, spatula, bowl, knife, board, measuring spoons, and 4 serving bowls before cooking. · 5 min
What to look for: All ingredients and tools are ready at the stove.
- Chop Kimchi
Chop the aged kimchi into bite size pieces, keeping its juices in the bowl because they season the rice and help the grains color evenly. · 4 min
What to look for: Kimchi pieces are small and juicy, with liquid saved.
- Brown Pork
Heat most of the vegetable oil in a wok over medium high heat, add diced pork, and fry until lightly browned and cooked through. · 5 min
When it is done: Pork reaches 63°C / 145°F internally and no pink remains on cut surfaces.
- Fry Kimchi
Add garlic and aged kimchi with its juices, then stir fry until the kimchi darkens, softens, and smells tangy. · 4 min
What to look for: Kimchi is darker red, glossy, and slightly reduced.
- Season Rice
Stir in gochujang, soy sauce, sugar, and cooked rice, breaking up clumps so every grain is red and glossy. · 5 min
What to look for: Rice is evenly coated and no pale clumps remain.
- Finish Rice
Drizzle sesame oil around the rice, toss for 1 minute, then taste and add a little more soy sauce only if the kimchi is not salty enough. · 2 min
What to look for: Rice looks shiny and smells nutty from sesame oil.
- Fry Eggs
Heat the remaining vegetable oil in a clean skillet, crack in eggs, and fry until whites set while yolks stay soft. · 3 min
What to look for: Egg whites are opaque and edges are lightly crisp.
- Serve Rice
Spoon hot kimchi rice into bowls, top each serving with 1 fried egg, and serve at once while the edges are crisp and glossy. · 2 min
What to look for: Each bowl has a mound of red rice crowned with a fried egg.
Nutrition (per serving)
| kcal | 627 |
|---|---|
| Protein | 23 g |
| Carbohydrates | 68 g |
| of which sugars | 7 g |
| Fat | 29 g |
| of which saturated | 7 g |
| Fibre | 3 g |
| Sodium | 1349 mg |
Nutri-ScoreC
Allergens
Contains: gluten, eggs, soybeans, sesame, soy
May contain: fish, crustaceans
Storage and reheating
- Fridge: up to 3 days
- Freezer: yes, up to 1 months
- Reheat rice in a covered skillet with a small splash of water until steaming hot throughout, and cook a fresh egg if possible.
Ingredient substitutions
Pork
- Spam: Spam is a common Korean home style option for this dish.
Gochujang
- Soy sauce: Use only if gochujang is unavailable, with less sweetness and chile depth.
Sesame oil
- Vegetable oil: Use only when sesame must be avoided, since the nutty finish will be missing.
Vegetable oil
- Sesame oil: Use with moderate heat because sesame oil has a stronger aroma.
Soy sauce
- Salt: Use sparingly because it adds saltiness without fermented soy flavor.